
프로젝트 개요
🏁 Goal: MSA 구성, Redis 캐싱, Docker 기반 CI/CD 구성
- MSA 아키텍처를 직접 구성
- Eureka, Ribbon 을 이용해서 분산처리 시스템을 구성
- MSA 환경에서 병목 현상이 발생 하여도 쉽게 오류가 나는 부분을 찾을 수 있도록 구성
- Redis 캐싱 적용
- Docker 사용, Git Push 만으로 서버에 자동으로 업데이트 구성
🤔 notification : 과제 요구 사항
패키지명 규칙과 포트 규칙 준수
- 패키지명은
msa_exam으로 설정, 유레카 서버는19090포트로 실행 - 게이트웨이 서비스는
msa_exam.gateway패키지로 추가하고19091포트로 실행 - 상품 서비스를
msa_exam.product패키지로 추가하고19093,19094포트로 실행 - 주문 서비스를
msa_exam.order패키지로 추가하고19092포트로 실행 - 인증 서비스를
msa_exam.auth패키지로 추가하고19095포트로 실행
모든 API 의 Response Header 에 Server-Port Key 로 현재 실행중인 서버의 포트를 추가

프로젝트 설계 및 초기 구성
프로젝트 구조
msa_exam
ㄴ eureka (Eureka server) port: 19090
ㄴ gateway (Eureka client) port: 19091
ㄴ order (Eureka client) port: 19092
ㄴ product (Eureka client) port: 19093, 19094
ㄴ auth (Eureka client) port: 19095
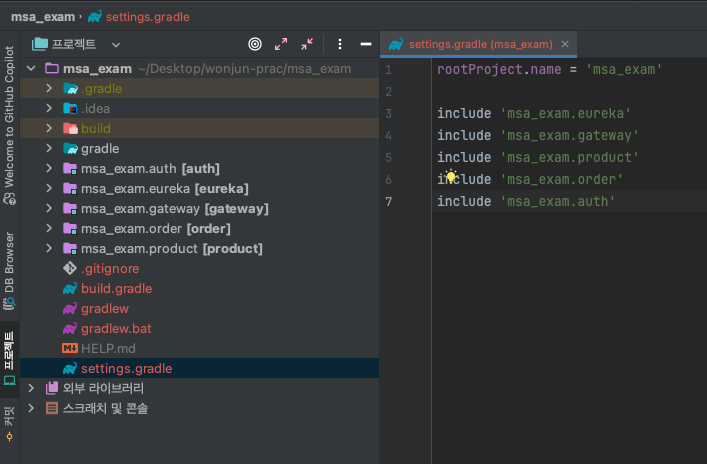
내부에 있는 각 디렉토리의 settings.gradle은 지운다.
→ 루트 디렉토리 안에서만 setting.gradle을 두고 한꺼 번에 관리한다.
msa_exam.eureka (eureka-server) > MsaExamApplication
@SpringBootApplication
@EnableEurekaServer
public class MsaExamApplication {
    public static void main(String[] args) {
        SpringApplication.run(MsaExamApplication.class, args);
    }
}
@EnableEurekaServer 를 잊지말고 반드시 추가해주자.
msa_exam.eureka (eureka-server) > application.yml
spring:
  application:
    name: eureka-server
server:
  port: 19090
# 유레카 서버 설정
eureka:
  client:
    register-with-eureka: false
    fetch-registry: false # 유레카 서버이므로 false로 설정
    service-url:
      defaultZone: http://localhost:19090/eureka/ # 클라이언트가 유레카 서버와 통신하기 위해 사용할 기본 서비스 URL
  instance:
    hostname: eureka-server # 유레카 서버의 호스트 이름
build.gradle 의존성 추가
implementation 'org.springframework.cloud:spring-cloud-starter-netflix-eureka-server'
msa_exam.gateway > application.yml
spring:
    application:
        name: gateway-service
    main:
      web-application-type: reactive
    cloud:
      gateway:
        routes: # Spring Cloud Gateway의 라우팅 설정
          - id: order-service # 라우트 식별자
            uri: lb://order-service # 'order-service'라는 이름으로 로드 밸런싱된 서비스로 라우팅
            predicates:
              - Path=/orders/**
          - id: product-service
            uri: lb://product-service
            predicates:
              - Path=/products/**
          - id: auth-service
            uri: lb://auth-service
            predicates:
              - Path=/auth/**
        discovery:
          locator:
            enabled: true # 서비스 디스커버리를 통해 동적으로 라우트를 생성
server:
  port: 19091

eureka:
  client:
    service-url:
        defaultZone: http://localhost:19090/eureka/
build.gradle 의존성
implementation 'org.springframework.boot:spring-boot-starter-actuator'
implementation 'org.springframework.cloud:spring-cloud-starter-gateway'
implementation 'org.springframework.cloud:spring-cloud-starter-netflix-eureka-client'- gateway-mvc (gateway)가 아닌 gateway (reactive gateway)를 사용

msa_exam.order > application.yml
spring:
  application:
    name: order-service
server:
  port: 19092
eureka:
  client:
    service-url:
      defaultZone: http://localhost:19090/eureka/
msa_exam.product > application.yml
spring:
  application:
    name: product-service
server:
  port: 19093
eureka:
  client:
    service-url:
      defaultZone: http://localhost:19090/eureka/
msa_exam.auth > application.yml
spring:
  application:
    name: auth-service
server:
  port: 19095
eureka:
  client:
    service-url:
      defaultZone: http://localhost:19090/eureka/
msa_exam.order/product/auth
build.gradle
implementation 'org.springframework.cloud:spring-cloud-starter-netflix-eureka-client'
implementation 'org.springframework.cloud:spring-cloud-starter-openfeign'- eureka 클라이언트
- openfeign을 사용하여 통신
구성한 설정이 잘 동작하는 지 실행 → Eureka server를 먼저 키고 그 다음 차례로 client 실행

localhost:19090에 접속하여 Eureka client 인스턴스로 잘 등록되었는 지 확인!!

😱 Trouble Shooting
application.yml → 이름 application이 틀리면 스프링 부트에서 읽지 못하고 기본 프로필로 적용되므로 주의 하자.